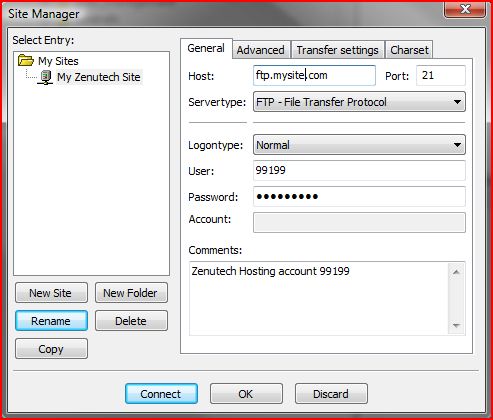
The FileZilla FTP Client can be used to upload changes to your website. Once you have installed it, you will need to go to ‘File’->’Site Manager’. Click ‘New Site’, give it a name, and enter the information sent to you in your “Welcome to Zenutech” email. Look for a section like:
To access your account via FTP simply use:
Server: ftp.mysite.zenutech.com
Username: 99199
Password: ufC$da87
Once finished, click ‘OK’.
To connect to your site, click the arrow beside the first icon beneath the menu bar, and select your site from the drop down menu:

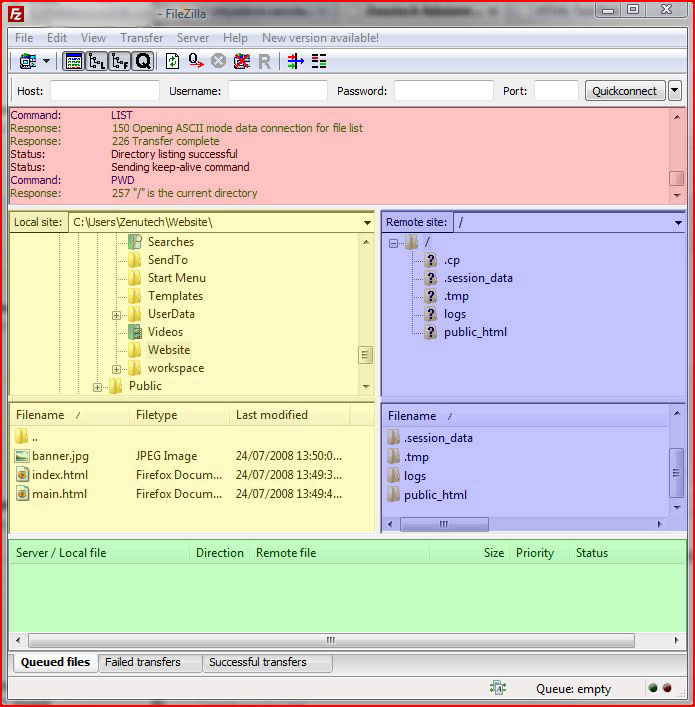
This will connect you to the server. You should see something like:
♦The red section at the top displays FTP status information.
♦The green section at the bottom shows the files queued for download or upload
♦The yellow section on the left (“local site”) shows a list of folders and files on your local computer
♦The blue section to the right (“remote site”) displays your account on the Zenutech server
To upload your site, you need to browse to the folder on you local computer (yellow section) it is stored, and drag the files to the appropriate folder on the server (blue section).
Please note that in order for your site to be visible on the internet, you need to place the files in the public_html/ directory on the Zenutech server.

